April Creative Day Project: Easter Bunny Watercolour Tag
This sweet little Easter craft project is an absolute delight to make—perfect for handmade gifts, adding a special touch to your scrapbook layouts, or tying onto an Easter basket for a creative flourish!
Easter Tag Collage:
As part of our April Creative Day Project, we’re diving into a playful mix of watercolor, collage, and just the right amount of whimsy. This was an easy project and easy to re-create. Of course its perfect for Easter craft activities.
What You’ll Need:
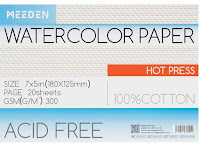
- Watercolour paper
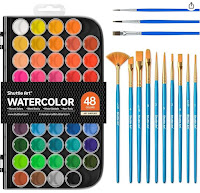
- Watercolour paints + water + paintbrush
- Gel medium (matte finish works best)
- Easter bunny napkin (or any sweet Easter-themed napkin)
- Floral/leaf stamps + coloured inks
- Scissors or tag die
- Ink for edging (distress ink works great)
- Embellishments: gems, glitter, ribbon, etc.
- Sentiment (stamped or printed)
Step 1: Paint That Background
Start with a sheet of watercolor paper. Lightly mist it with water if you want softer blends. Then go in with your watercolour paints—soft pastels work beautifully for spring. Just play and let the colors flow! You don’t need to be an artist here—watercolor is wonderfully forgiving and loves to do its own thing. Let it dry completely.💡 Tip: Dry it with a heat tool.
Step 2: Get Sticky with Gel Medium
Once your watercolor background is dry, brush on a thin layer of gel medium over the area where your napkin will go. Let it dry slightly—just enough so it's not soaking wet but still tacky.
Gently separate the printed top layer of your napkin (just the top—yep, napkins have layers like onions). Lay it down slowly over the gel-covered area, smoothing out any creases as you go. You can use a plastic card or your fingers—just be gentle.
Once it’s down and you’re happy with the placement, brush another thin layer of gel medium over the top to seal it in. Let it dry again.
Step 3: Blend the Edges
Dip back into your watercolor paints and softly blend around the edges of the napkin image. This helps the design feel like part of the background instead of just "plonked" on top. A little blending magic goes a long way here!
Step 4: Stamp It Pretty
Now it’s time to add some stamped floral or leafy goodness around your bunny to frame the image. This adds that extra detail and makes it feel more dimensional and intentional. Stamp lightly—you don’t need to go overboard here. We’re just giving it a garden feel.
Step 5: Shape It Into a Tag
Cut your design into a tag shape. You can trace a tag you already have, use a die, or freehand it if you're feeling adventurous. Then, ink the edges with a coordinating distress ink to give it a finished, vintage vibe.
Step 6: Embellish All the Things
This is the fun bit—add little gems, a dash of glitter, or any extra sparkly bits that make you happy. Pop a ribbon through the top of the tag to finish it off. 🎀 We used seam binding which we dyed with some coloured ink and a included a second coloured ribbon to mix it up.
Step 7: Add Your Sentiment
Finish it up with a sweet sentiment—“Happy Easter,” “Some Bunny Loves You,” or anything that makes your heart hop with joy.
🌸 NOTE: If you give this project a try, I’d love to see what you create—tag me in your crafty posts! 🎀💖#SundayCreativeDay #ScrapofYourLife


.png)


No comments