Tutorial - Quick Mini Folio Scrapbooking Idea
This is such a fun and easy project! That's what we like for our make n takes!! However, I must admit this make n ' take did take a little longer than usual.
What you need to make the Mini Folio
1 x sheet of 12 x 12 Scrapbooking Paper (Double or Single Sided)
Printable or Diecuts
3 x 4 Pocket Cards
Distress Ink - Antique Linen, Green
Brads and Twine
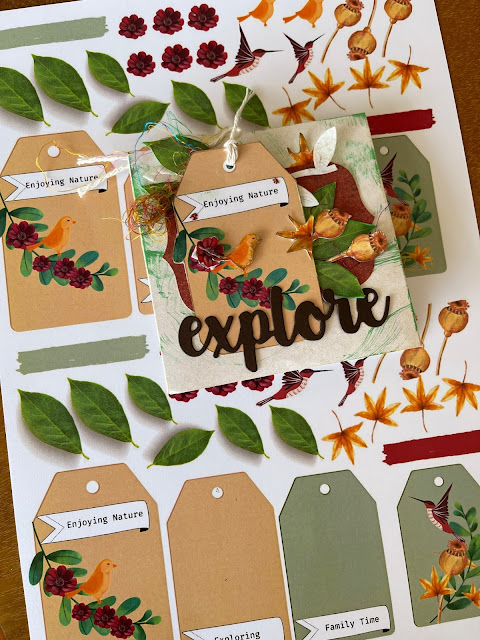
I created this quick Nature themed printable using a warm colour Autumn Colour palate. The printable has banners, tags, gumnuts, bird and flowers.
This printable has images which need to be Fussy Cut. I find that leaving a white border around the images helps the image to pop and means you don't have to be so perfect with cutting on the line.

I already knew what photos I was going to add to the folio. You will need to print photos that are quite small ranging between 1.5" x 2" up to just a little smaller than 3" x 4".
Easy and Quick Instructions:
- Choose single or double-sided 12 x 12-inch scrapbooking paper.
- Trim the edge strip off the paper.
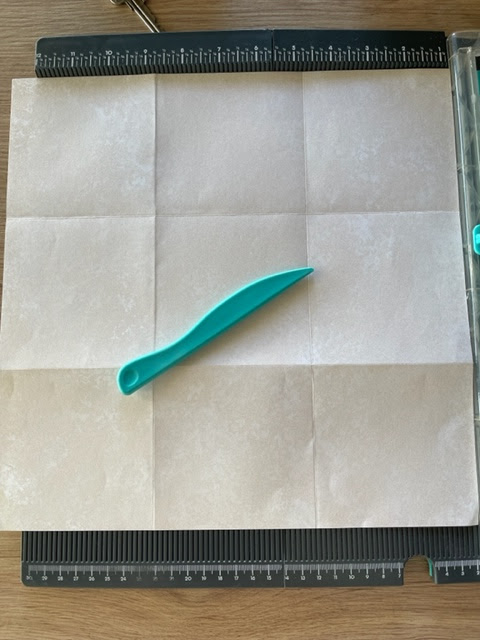
- Score at the 4" and 8" mark and then turn the paper and score again at the 4" and 8" mark. You will end up with nine squares of equal size.
- Draw a line from each corner of the paper to the opposite point score line - see the image.
- Cut from each corner to the centre and on the corresponding inside score line.
You'll end up with a Christmas Tree shape. - Fold each of the Triangles towards the centre and adhere the bottom flaps down. Don't adhere the sides.

Note: Because I used a sheet of single-sided 12 x 12 paper. I knew there would be some places where the paper would be blank (white) on the inside of the folio. So I used three 3 x 4 Project Life cards and slid them in. If they are a little tight, just trim the edge and re-punch the corners with a corner rounder.
- Use the leftover triangle shapes and punch out tags with a large tag punch. You can back two tags together to make them a little thicker. Punch tiny holes in the top and thread brads or twine through them.
These were very easy to make and would be perfect to use in a planner or memory-keeping book. As well as incorporating into a traditional layout.
Download the Autumn Printable Used in this Project
RELATED BLOG POSTS
Autumn Scrapbooking Layout Title Ideas (Free Download)
RELATED HASHTAGS
#autumnscrapbooking #autumnscrapbook #autumnscrapbookideas #autumnscrapbooklayout #autumnscrapbookpages #autumnscrapbookinspiration #autumnscrapbooktitles #autumnscrapbookquotes #autumnscrapbookmemories #autumnscrapbookchallenge #autumnscrapbookfun #autumnscrapbookproject #autumnscrapbooktheme #autumnscrapbookdesign #autumnscrapbooklove #autumnscrapbookart #autumnscrapbookcrafts #autumnscrapbookdecor #autumnscrapbookdiy #autumnscrapbookalbum


.jpg)


No comments